WebSockets are a great way of updating UI in real-time based on back-end events. However, I found there can be a few gotchas and nuances when trying to scale them. This article briefly covers using WebSockets with Laravel Vapor, but this should also apply when setting up load-balanced WebSockets for Laravel in general.
First, we'll be using the Node,js package Laravel Echo Server by Thiery Laverdure, which uses Socket.io as its WebSocket driver. There are alternative options available which work just as well, such as Laravel Websockets by Beyond Code.
WebSockets with Laravel Vapor is perfectly achievable using the Pusher driver and a single server, which is the default config. The load and concurrent connections achievable with a single server can reach the tens of thousands quite easily, which will suit most use cases. But if you want to achieve a more scalable solution and higher loads without the aid of a third-party provider (such as Pusher or Ably), the ability to handle a higher capacity of connections (in the hundreds of thousands), using the Pusher driver to broadcast events to a single server just isn't going to cut it...
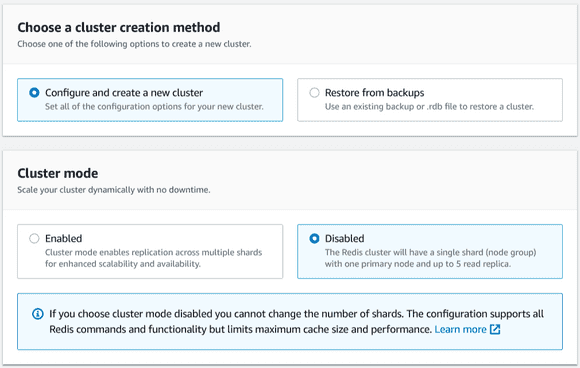
This is when you want to start looking at using a centralized data store and have multiple servers handling connections behind a load-balancer. Redis is an ideal candidate for this, it's fast, efficient and supports pub/sub. Additionally, both Laravel and Laravel Echo Server support Redis for broadcasting out of the box. There is one important note here that caught me out... and that is WebSockets require a non-clustered Redis instance to function correctly, which Laravel Vapor does not support out of the box. Their Redis cache stores are clustered by default. So this means you will need to create a non-clustered instance manually outside of Vapor.
Setting up Redis
This is fairly simple in AWS, go to ElastiCache and create a new instance in the same region as Vapor with cluster mode disabled.
You will also need to select the same VPC that Vapor uses and use the same default security group on the next step. As for the other options in terms of size, backups etc. this is up to you and what you feel you will need. I don't see much point in having backups for WebSockets and you can modify the size of your node later if you need.
Setting up the WebSocket Server
Now we want to setup an EC2 instance to install Laravel Echo Server and handle our connections.
Launch a new instance using Amazon Linux. Again, up to you on the size. But the beauty of us using a load balancer means we can scale out to as many instances as we need, so a medium-sized instance should be more than sufficient for our needs.
Again, ensure that the instance is on the same VPC and security group as the Redis instance that you created earlier, so that they can communicate.
Now we want to SSH into our new server and set it up for WebSockets.
First install Node.js;
curl -sL https://rpm.nodesource.com/setup_16.x | sudo bash -
sudo yum install -y nodejs
Now we have Node.js and npm available, we can go ahead and install Laravel Echo Server and pm2.
sudo npm install -g laravel-echo-server pm2
Let's setup and configure our WebSockets server;
sudo mkdir /opt/echo && cd /opt/echo
sudo laravel-echo-server init
This will run through an interactive prompt and build a configuration file for you inside the /opt/echo folder. When prompted, enter port 80, Redis for presence channels and http when asked about where you want to serve from. Your auth domain is the domain of where your Laravel project will be.
This will now have generated a configuration file that we will need to edit and add our Redis instance to. Grab the primary endpoint for your Redis instance in AWS and add it to the database config along with the Redis port, which by default is 6379.
# sudo vim laravel-echo-server.json
{
    ...
    "databaseConfig": {
            "redis": {
                    "port": "6379",
                    "host": "websockets.XXXXXX.ng.0001.euw2.cache.amazonaws.com"
            },
            "sqlite": {
                    "databasePath": "/database/laravel-echo-server.sqlite"
            }
    },
    ...
}
Now we're ready to start our server and ensure it works.
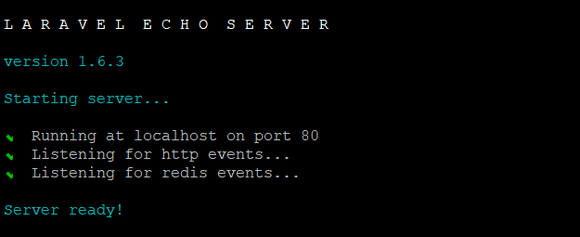
sudo laravel-echo-server start
W00t! 🎉🎉🎉
Now that we know the server is working, we can quit out and setup pm2 to manage it for us. pm2 will start our WebSockets server when the ec2 instance boots and keep it running.
sudo pm2 start "laravel-echo-server start"
This should start up pm2 and then start the WebSocket server. You can check this by either going to your instances ip address in the browser and ensuring you see the text OK or use sudo pm2 status at any point to ensure that it is still up and running.
Now we want to tell pm2 to always start the server when the instance boots. With the WebSockets still running, run the following commands;
sudo pm2 startup
sudo pm2 save
These commands will create a startup script and save the current process list to it.
Finally, another gotcha... Even though we're setting things up for scale, we still want our individual servers to handle as many concurrent connections as possible. So we will want to increase our default ulimits before we leave as these are usually set to a default of 1024, meaning if we hit 1024 concurrent connections on a single server we're going to have users being disconnected from the server.
The new setting depends on the size of the instance you're going with. Based on metrics and load I chose 40k, but your results may vary. Open the limits.conf file and add the following to the end.
# sudo vim /etc/security/limits.conf

*                soft    nofile          40000
*                hard    nofile          40000
root             soft    nofile          40000
root             hard    nofile          40000
This will prevent connections from being recycled or rejected up to a total of 40,000. You will need to reboot the system to see this change take effect, but in the next step we're going to be rebooting the instance when creating an image. So there's no need to check this right now.
Create your WebSockets AMI
Now we have our working WebSockets server setup, we want to make an image from it for use when scaling out behind our load balancer.
Go to your instance in AWS and create a new image from it. One good thing about this is that it will reboot your instance during creation. So once your image has been created, you should be able to double-check that the server boots up correctly by visiting the instance IP and seeing the OK text. You can also SSH back in and ensure the ulimit setting we applied earlier worked by running ulimit -n
Create Target Group and Load-Balancer
While your image is being created, go to the EC2 target groups area and create a new target group for instance types in your VPC with HTTP protocol on port 80. You will also need to update the health check protocol to HTTP.
On the next screen, select your WebSockets server, register it as pending and click "Create target group".
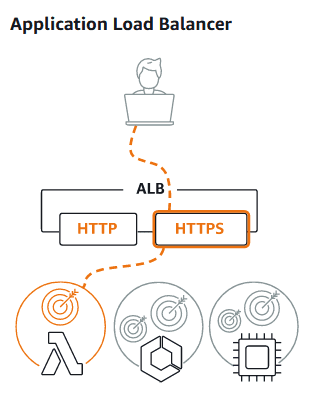
Now we have a target group, we can setup our load balancer. Go to the load balancers area in AWS and create a new Application Load Balancer.
You will want to select your VPC, at least two availability zones, the target group you just created and ensure that the listener is listening on HTTPS port 443.
You will also need to setup an SSL certificate on the domain you want to use for your WebSocket connections. The beauty of this is that we do not have to worry about SSL certificates on our WebSockets servers, it will terminate at the load balancer.
Once your load balancer has been created you should be able to update your domains DNS to point to the load balancer in Route 53 and visit the domain on HTTPS to see the OK message.
Finally, to help with reconnections from connection drops, you will want to update your target group to have sticky sessions. Go to your target groups attributes and check the stickiness checkbox.
Setup Launch Configuration and Auto Scaling Group
This step is optional, but makes things much easier when you want add more instances to your target group, instead of manually launching a new instance and assigning it to your target group you can create a launch configuration and auto scaling group that manages this for you.
Go to Launch Configurations and create a new Launch Configuration that uses the AMI you created earlier, your choice of instance type and your existing security group.
Now go to Auto Scaling Groups and create a new Auto Scaling group that uses your launch configuration, VPC, load balancer and target group.
You can also define an auto-scaling policy here if you want to based on CPU utilization etc. Alternatively, you can choose to manually change your capacity at will.
Top Tip: You can define a tag in the last step with a key of Name and a value of websockets (or whatever you want) and any new instances that are created will be given this name in your EC2 instance list. 😎
After creating your auto scaling group it will start creating a new instance (as your original instance is not part of this group). You will soon see your new instance booted up and assigned to your target group. Feel free to terminate your original instance now as your instances will be managed by the auto scaling group.
To scale out or in, simply change the capacity values of your auto scaling group and it will do everthing else for you!
The final steps (if you haven't already) will be to update your Laravel project config to use Redis for broadcasting in config/broadcasting.php and add your new Redis instance to your Redis database config in config/database.php. It's worth creating a new .env variable (eg; REDIS_WS_HOST) specifically for this instances host, which is the same Redis host you configured the WebSockets server with.
'redis' => [
    ...
    'websockets' => [
        'host' => env('REDIS_WS_HOST', '127.0.0.1'),
        'password' => env('REDIS_PASSWORD', null),
        'port' => env('REDIS_PORT', 6379),
        'database' => env('REDIS_DB', 0),
    ],
],
You will of course need to setup Laravel Echo in your projects front-end to connect to your new WebSockets load balancer. I like to add this host in .env and output it in the meta to handle different environments.
So in my layout blade I have;
<head>
<meta name="ws-url" content="{{ config('app.web_sockets_url') }}">
</head>
Then in JS;
import Echo from "laravel-echo"

const websocketsUrl = document.head.querySelector('meta[name="ws-url"]');
window.io = require('socket.io-client');
window.Echo = new Echo({
    broadcaster: 'socket.io',
    host: websocketsUrl.content
});
Note: I have left out authorization headers for private channels here, as this will depend on your auth implementation.
Hopefully this article has helped you out with handling WebSockets at scale. Let me know on twitter if there is anything I have failed to mention. 👍


